CEDAR form: Getting Started
Getting Started: The least you need to know
- Remember to Save!
- You can collaborate to complete the form by sharing it
- Make sure you know which fields do and don't apply to your study --> Read the "Sections: Overview & Context" page (coming soon) before starting the form
- Detailed coverage for each field and response options are available in the "CEDAR Fields - Details" section (coming soon)
- Check out the FAQs document (coming soon) for questions and answers you may also be interested in!
Read below for tech tips on finding, using, and sharing the CEDAR form.
Accessing and Using the CEDAR form
Where to find it
Log in to cedar.metadatacenter.org.
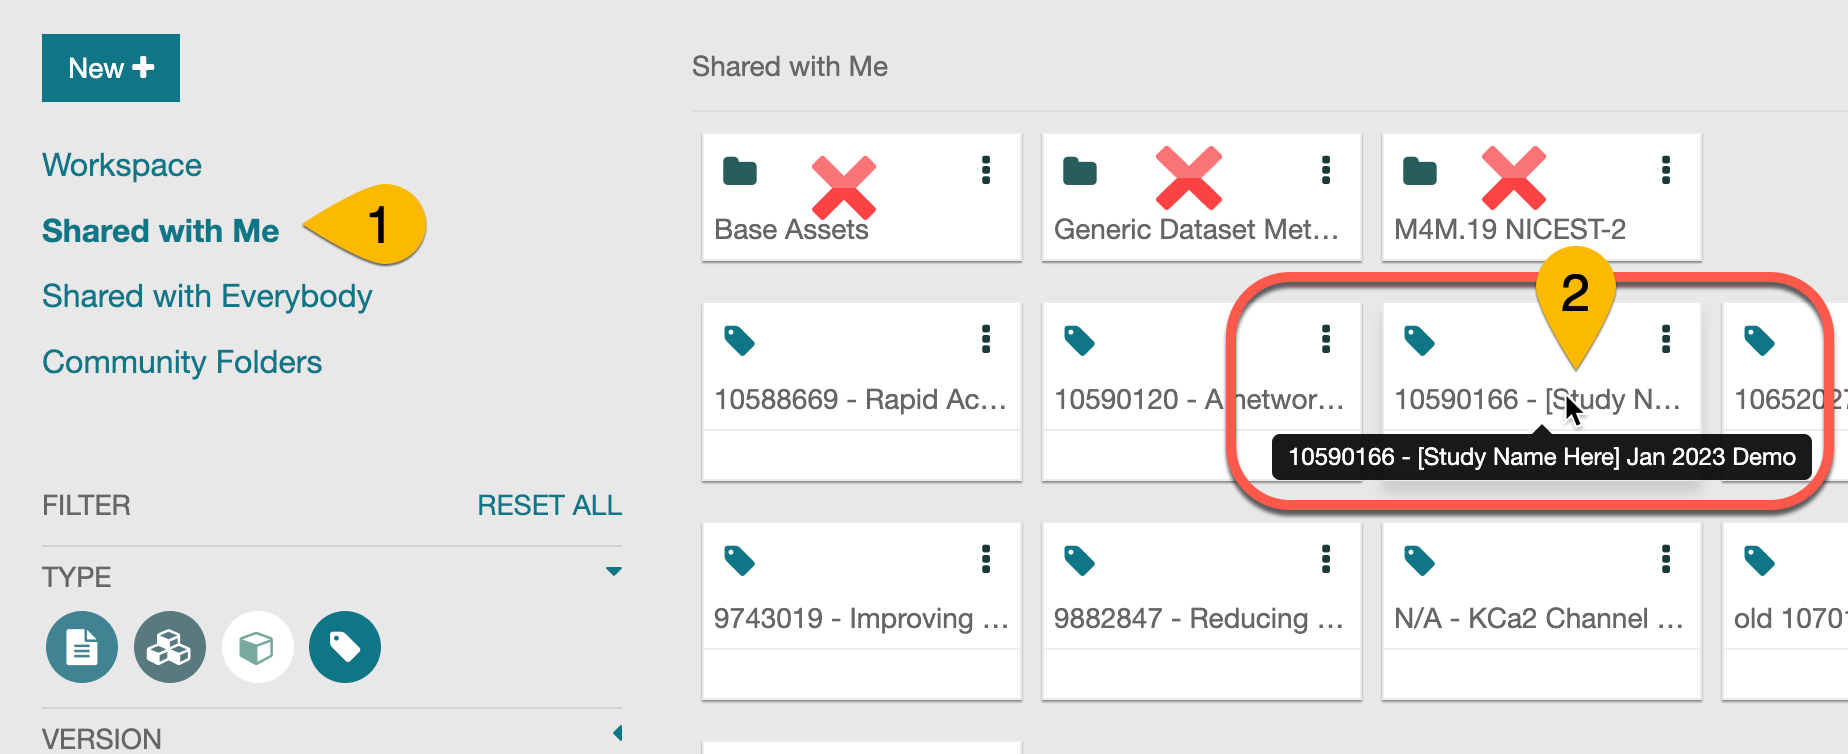
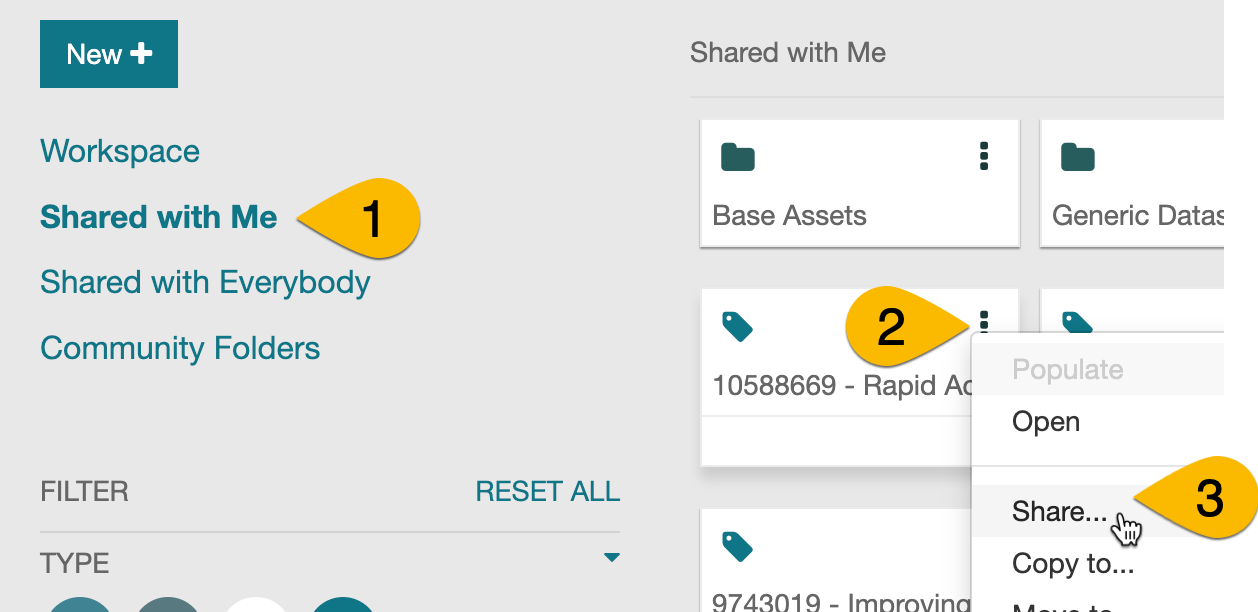
Click "Shared with me" in the left panel (#1).
Hover over the tiles to see the full study names and find the right form (#2).
Note: The file will not be in any of the folders (red X).
I can't find my form!
Step 1: Are you the person who registered the study?
Yes, I registered the study: Skip to Step 2.
No, someone else registered the study:
The CEDAR form is initially available to whoever registered the study. However, it can be shared. The person who registered the study can share it with you by following the instructions in this section. If that is not a solution, request that the form be shared with you at heal-support@gen3.org (please CC a PI on your email if you are not a PI).
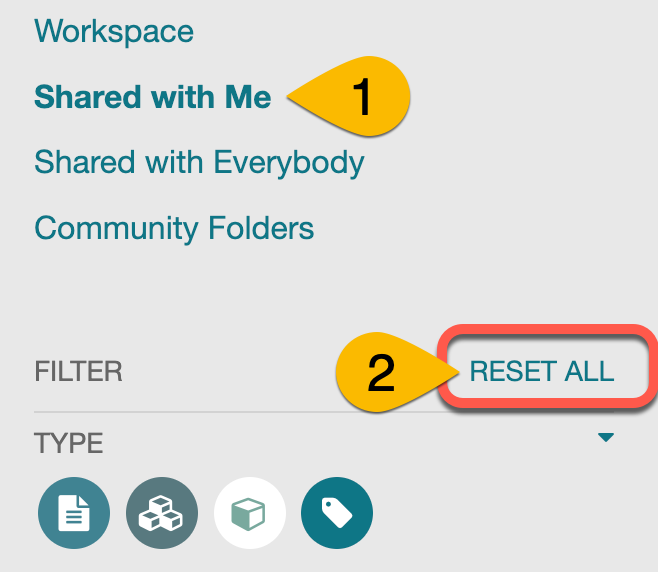
Step 2: On the Shared with Me page (#1), turn off any filters by clicking Reset All (#2) if you see it there.
Your study form may appear after resetting filters to the default.
If neither of these steps resolves your access to the CEDAR form, please reach out to heal-support@gen3.org for assistance.
Collapse and expand sections
By default, the CEDAR forms open in "expanded" format, with all metadata sections and fields visible.
Section headings are in green text, and metadata fields are in black.
You can collapse or expand a section by clicking on the green section heading.
Consider "collapsing" all sections when you open the form, and expanding them individually as you move through the form.
Save
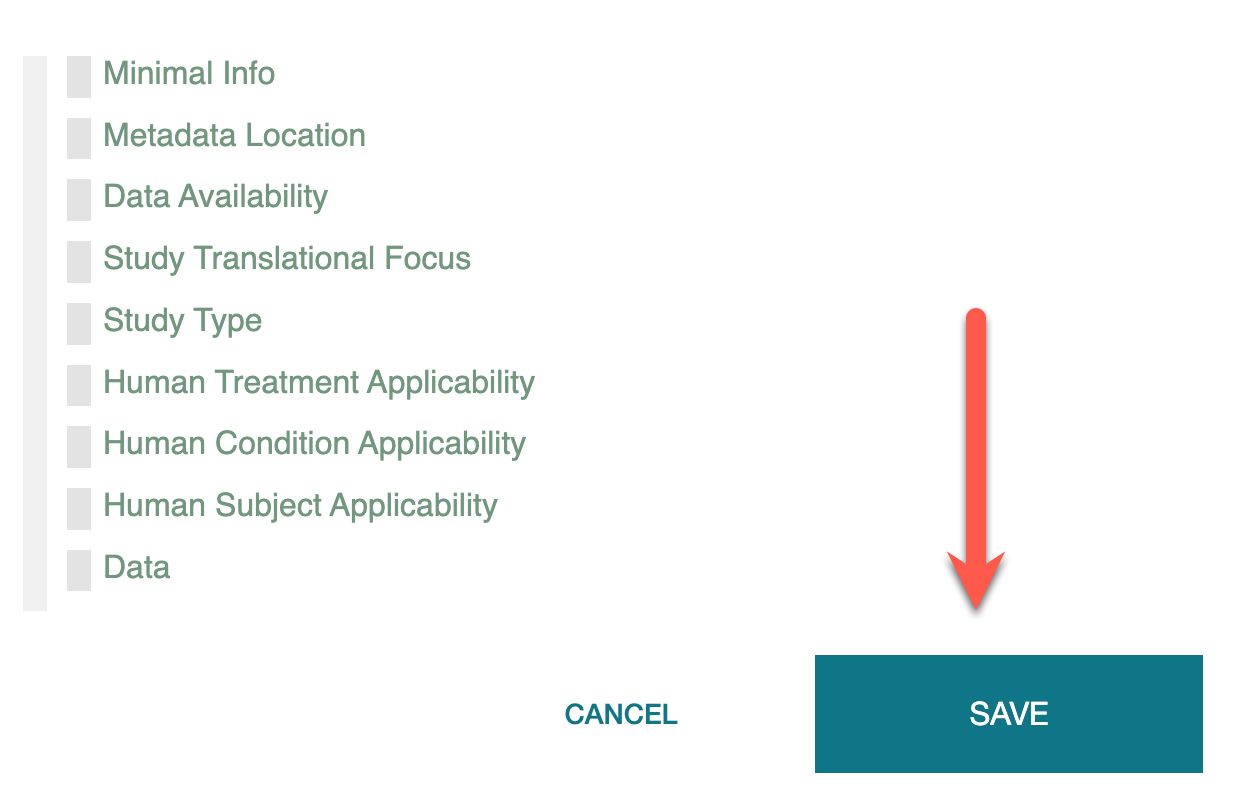
The form does NOT autosave. Please be sure to save your entries by scrolling to the bottom of your form and clicking the green “Save” button at bottom right of the form. Saving will not close the page or redirect you.
Save often while completing the form so you do not lose any entered metadata. Consider saving each time you complete a form section (or more often).
Be aware that the window will automatically log out after a certain period of inactivity, and it will NOT auto-save. Be sure to save before you switch tasks or step away from your computer.
Sharing with collaborators
The person who completed registration of the study on the HEAL Data Platform will be given access to the study's CEDAR form; however, multiple team members can collaborate on a form. The person who registered the study will be able to share access with other team members.
To provide team members access to a CEDAR form:
- First: Each team member needs a CEDAR account.
- To create an account, visit cedar.metadatacenter.org.
- Click "Register" below the Password line.
-
Enter your first name, last name, a functional email address (that you can click on a verification email for), and a password.
-
The person who registered the study can share the study's CEDAR form with other team members.
- Find the CEDAR form by logging in to cedar.metadatacenter.org/, then clicking "Shared with me" (#1). Hover over the tiles to see the full study names and find the right form.
-
Click on the vertical three dots in the right corner of the tile for the CEDAR form (#2), then click on "Share" (#3).
-
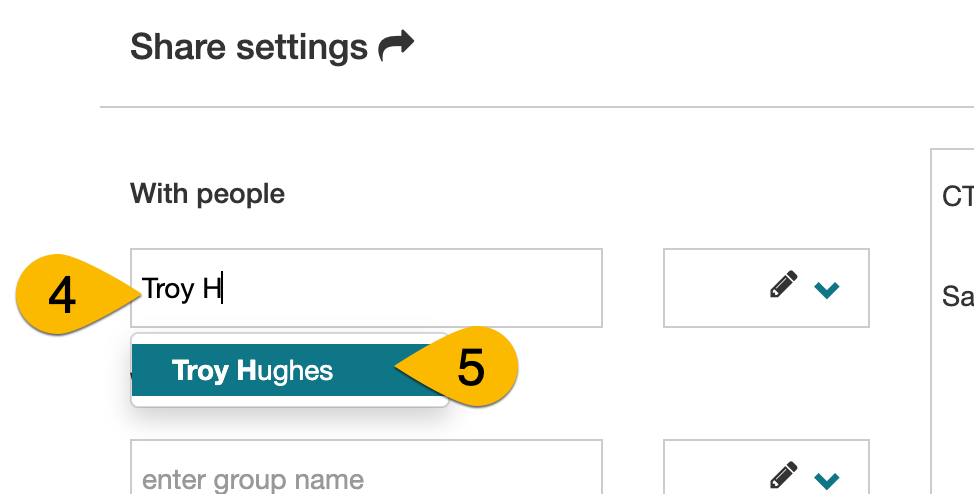
In the pop-up window, under "With People," start typing the collaborator's name (#4). Select their name from the list below (#5)
-
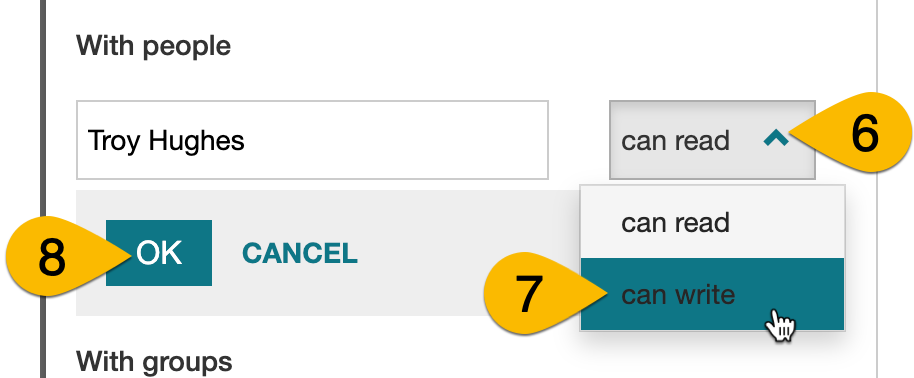
Use the dropdown on the right (#6) to select "can write" (#7) if you want the collaborator to make edits, or "can read" for collaborators who will only review, not edit. Then click the OK button (#8).
-
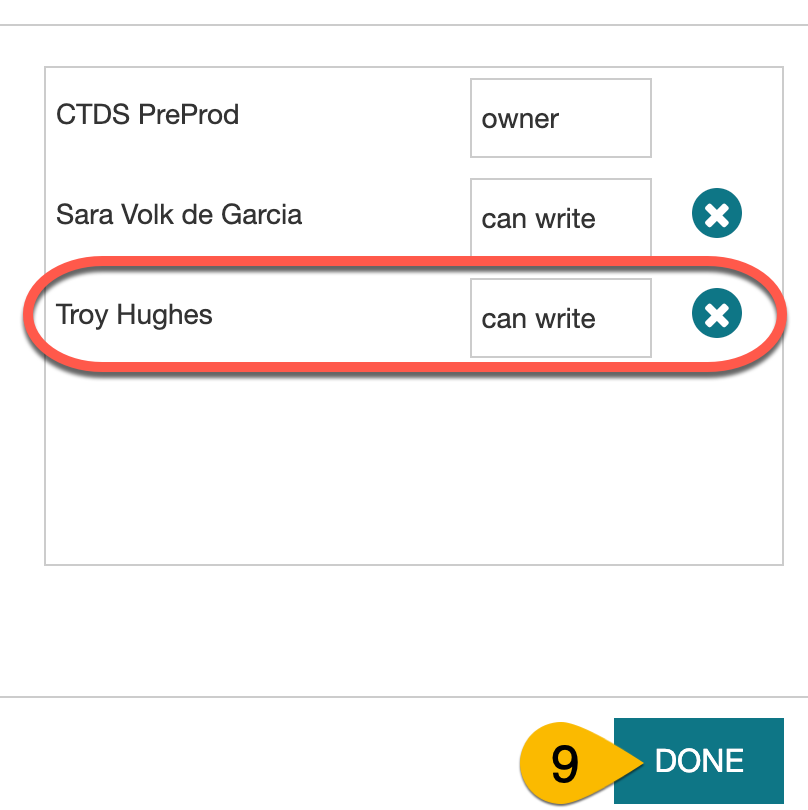
You will see the collaborator's name appear on the right side of the window (red circle). Click Done (#9) to close the window and save changes.
-
You can remove access from collaborators who have left the team by clicking on the X on the right side of the window.
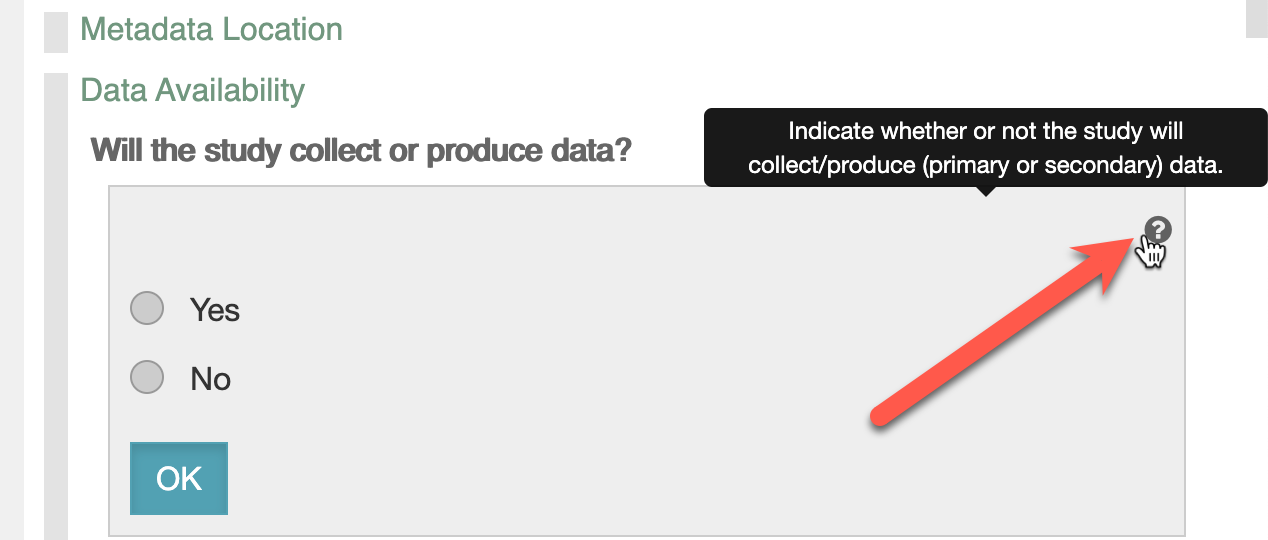
Help text & tooltips
Help text for each field is available while interacting with the field. Once you click into a field, a "?" icon is available in the upper right of the field area. Mouse over the "?" icon to view help text for that field.
How to select or remove a response for a field
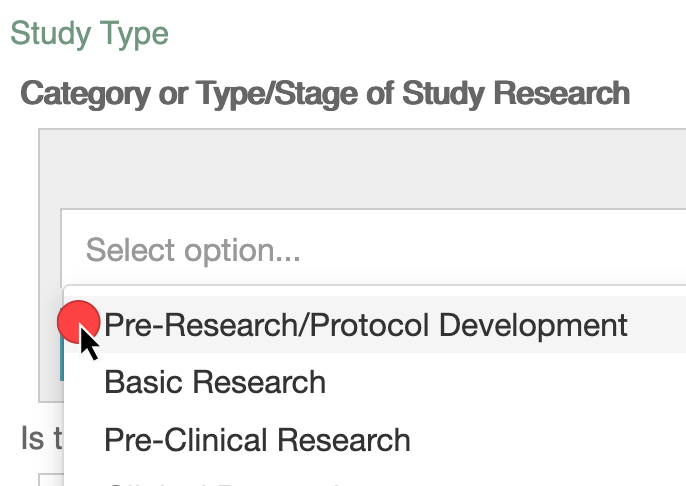
Most fields on the CEDAR form have a drop-down panel of options.
Click in the field to interact with the response options. You may then click to open the drop-down list of responses. Click on a response to select it for the CEDAR field.
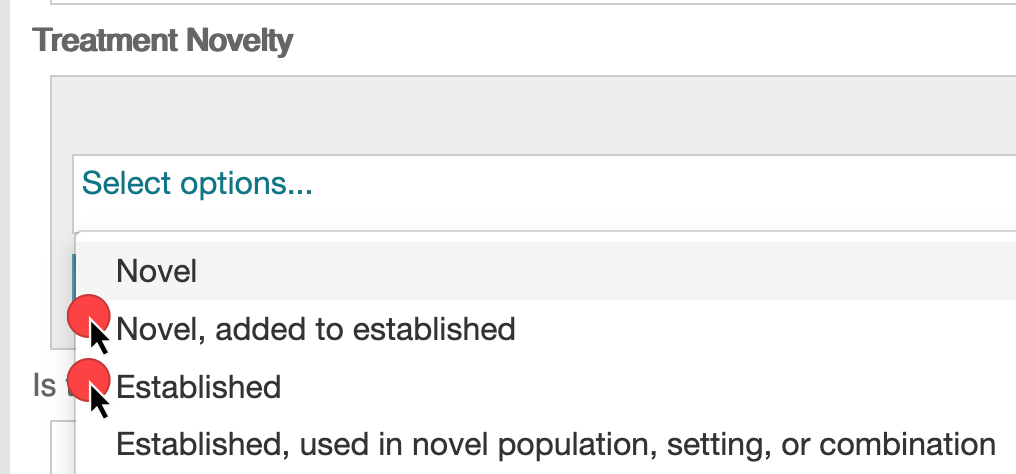
If the response field says "Select options" instead of "Select option," you may choose multiple responses for a field; simply click all options in the drop-down that apply.
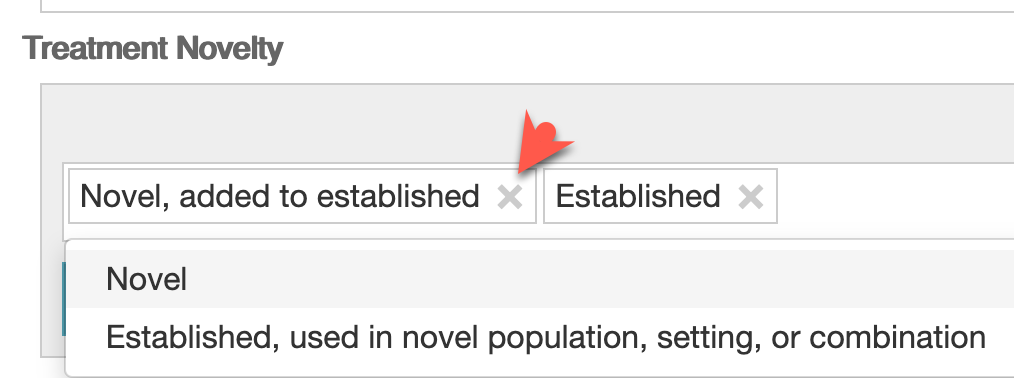
To remove a response that has been selected, click in the dropdown to select a new response. Or, for fields that allow multiple responses, click the X to the right of the
Jump to Sections: Overview & Context page (coming soon)
Jump to CEDAR Fields - Details page (coming soon)
Jump to FAQs (coming soon)